Friends Led की Brightness को Potentiometer से Control कर सकते हो आसानी से इस page को read करें Potentiometer आपने पहले भी use किया होगा Old tv का Volume इसी को rotate करने पर कम ज्यादा होती थी और Potentiometer का use Fan की speed control करने के लिए use होने वाला regulator के अन्दर भी यही होता है अभी मेरे द्वारा Design किया Circuit बनाना है बस फिर आप अपनी led की brightness control कर सकेंगे
Voice Assistant In Hindi
Led को Android से Control करें
Project के लिए Material और Circuit design
- Arduino uno
- Potentiometer
- Led
- Jumper wire
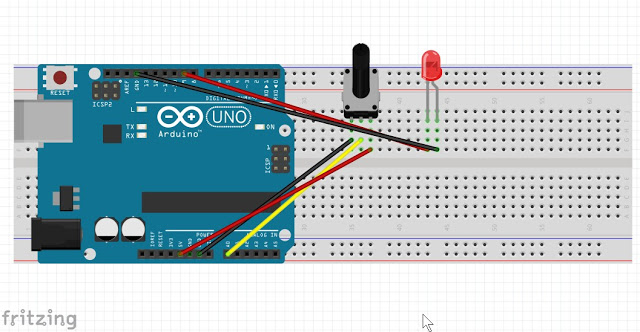
Brightness Circuit

इस image में दिख रहे Circuit जैसे आपको Circuit बनाना है जिसमे led की long pin को और short को क्रमश Arduino की Pwm 9 से और Gnd से connect करें और Potentiometer की मिडिल pin को Analog pin A1 से और left और right side pins को 5v और Gnd से Connect करें और Board से Programming cable से Computer से Connect करें जिसमे Arduino ide हो
Visual Studio से Led Control कैसे करें
Programming
इस Program को copy करें और Software को launch करें और इस program को Paste करें Arduino में Upload करें Program केसे upload करें
Button से led control कैसे करें
int sensorPin = A1;
int ledPin = 9;
int sensorValue = 0;
void setup() {
pinMode(ledPin,OUTPUT);
pinMode(sensorPin,INPUT);
Serial.begin(9600);
}
void loop() {
sensorValue = analogRead(sensorPin);
analogWrite(ledPin, sensorValue/4);
Serial.print(sensorValue/4);
}
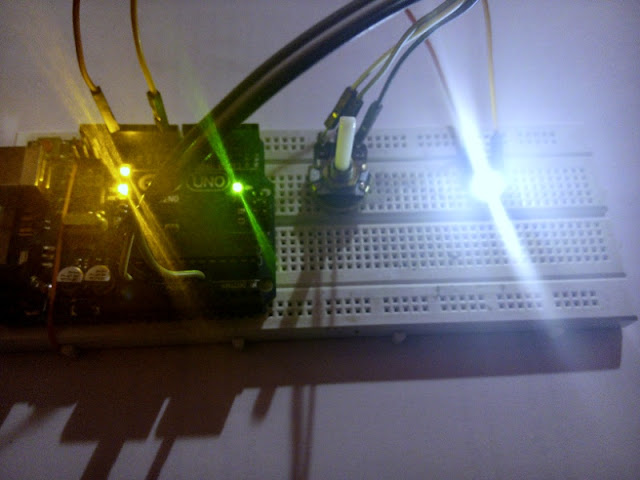
Sketch Upload करने के बाद अब आप led की Brightness control कर सकते है जब आप Potentiometer की knob को rotate करेंगे तो led की Brightness कम ज्यादा होती है Read करने के लिए thanks www.mechanic37.com पर regular Article publish होते है इनको Direct अपने mobile पर पाने के लिए नीचे box है उसमे अपना email fill करें और subscribe Button पर click करें आप इस Project को Facebook और अन्य पर share कर सकते है share buttons नीचे है और कोई problem हो तो इसके लिए Comment करें


Leave a Reply